%20(1).png?width=196&height=40&name=Logo%20Eversports%20Horizontal%20(1)%20(1).png)
In this article, we’ll walk you through how to manage rates in your Eversports Manager.
You’ll learn:
-
How to create and edit individual seasons
-
How to create and edit rates for specific seasons
-
How to create rates for specific customer groups
1. Where to find the rate management
You can find the rate management in Settings > Rate Management.
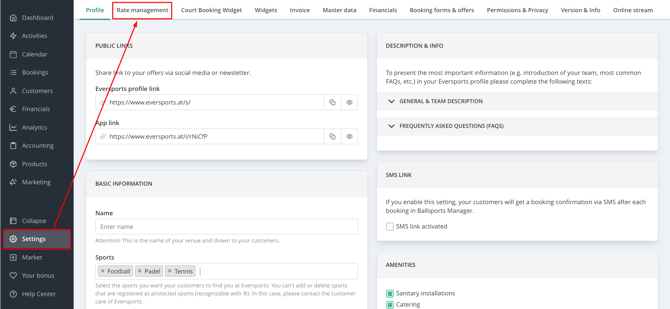
1.1 Sports
Review the sports you want to offer at your facility and add them if necessary.
Settings > Profile > Basic Information
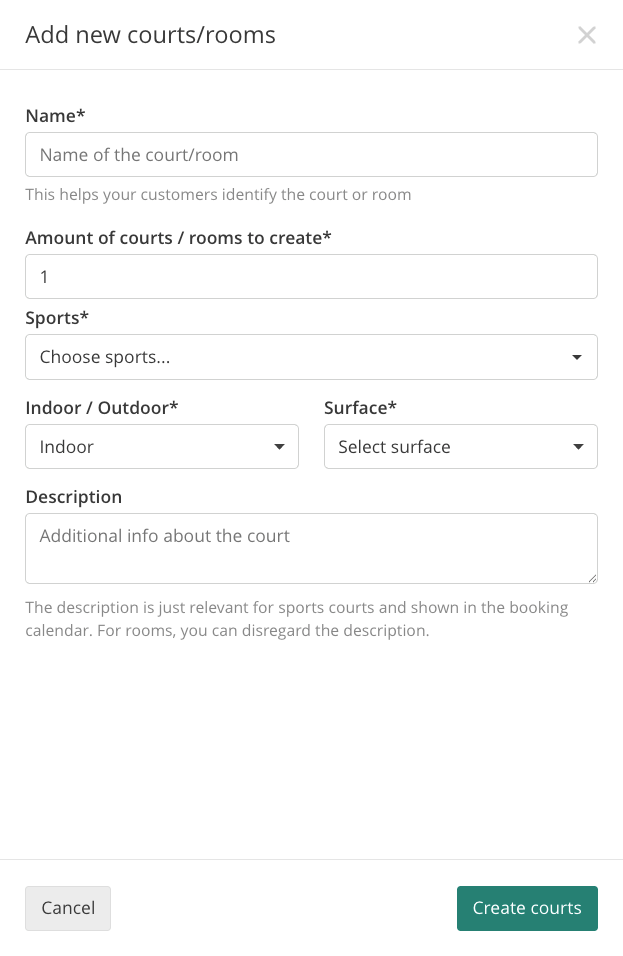
1.2 Create courts/ rooms
To create your sports courts, go to Settings > Profile > Sports courts & rooms for activities.
Use the Add court/room button to create a new court and add it to your facility.
This also applies to e.g. bowling alleys, ping pong tables, and swimming pools and lanes!
2. How to create a time range/ season
First, go to the rate management and select a sport for which you want to create a time period/ season.
If you need to configure each court within the same sport individually, please contact our support team via chat or email (support@eversports.com).
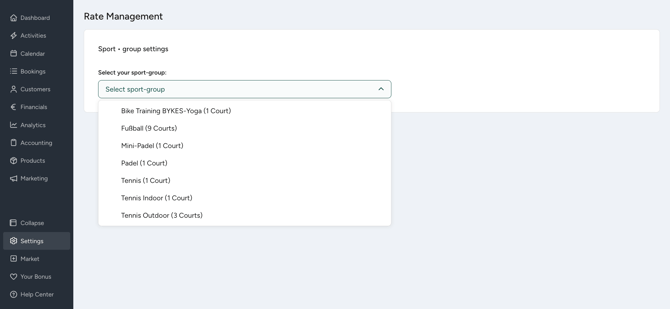
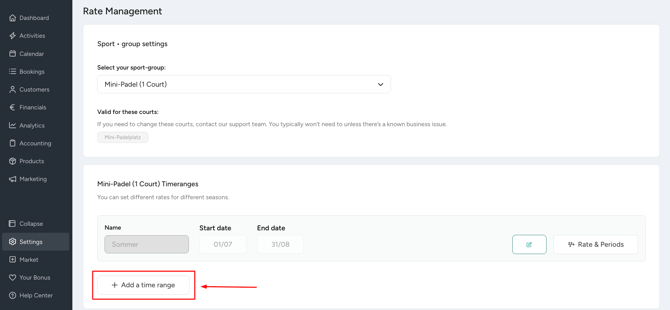
You can create a time range by clicking the Add a time range button.
Time ranges are annually recurring seasons or holidays during which specific rates apply.
You can give the time range a custom name and set the start and end dates.
The system gives priority to a time range within another time range.
Here’s an example:
Time range A runs from July 1 to August 31, and time range B runs from July 10 to August 10. In this case, the rates for time range B apply to the days from July 10 to August 10 and are given priority.
Rates from time range A that are nevertheless intended to apply to time range B must be re-entered into time range B.
After you've entered the name and the start and end dates, you can create the time range by clicking the Create button.
Hint: To create a holiday with special opening hours and rates more easily, you can add a holiday in Settings > Holidays > Add Holiday. It will then automatically appear in the time ranges/seasons.
3. How to create periods and rates
Clicking the Rate & Periods button will take you to the rate settings.
Periods specify which rates apply at what times and on which days of the week.
They also define the Interval of each bookable unit.
One period can include multiple rates (prices) for various customer groups.
To create a period, click the “Add period” button.
Here, you can configure the following settings:
-
Name of the period
-
Time at which the rates of this period apply
-
Interval of bookable units, including the time unit (e.g., 30 minutes or 1 hour)
-
Days of the week on which the rates of this period apply
-
Customer groups to which the rates of this period apply
-
Type of booking: Should this rate apply to single bookings or recurring bookings?
-
Price
-
Min. duration: The minimum number of units that must be booked consecutively.
-
Max. duration: The maximum number of units that may be booked consecutively.
To add another rate for this period, click the Add rate button and specify the customer group (Select a group) to which it should apply, as well as the price and duration.
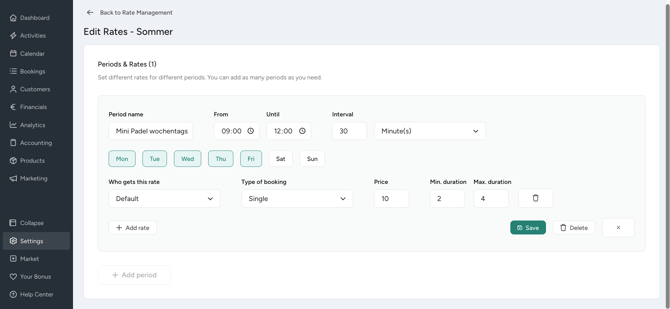
Hint: By creating a rate for a customer group, you can make certain courts available at specific prices for selected customer groups and block other groups by not creating a rate for them.
Once you've set your rates, you can click the Save button.
You can also adjust your rates at any time by clicking the Edit button.